Studio Renovation

For those of you who follow ClayMotion on Facebook, Twitter or Instagram you will know that there have been some major renovations happening in the studio… and, yay, they are now all finished!

The renovations were begun during the last two week school holiday break in response to growing class sizes. I decided I needed  separate glaze room and additional storage space. So in we plunged, “we” being the hubby and I!

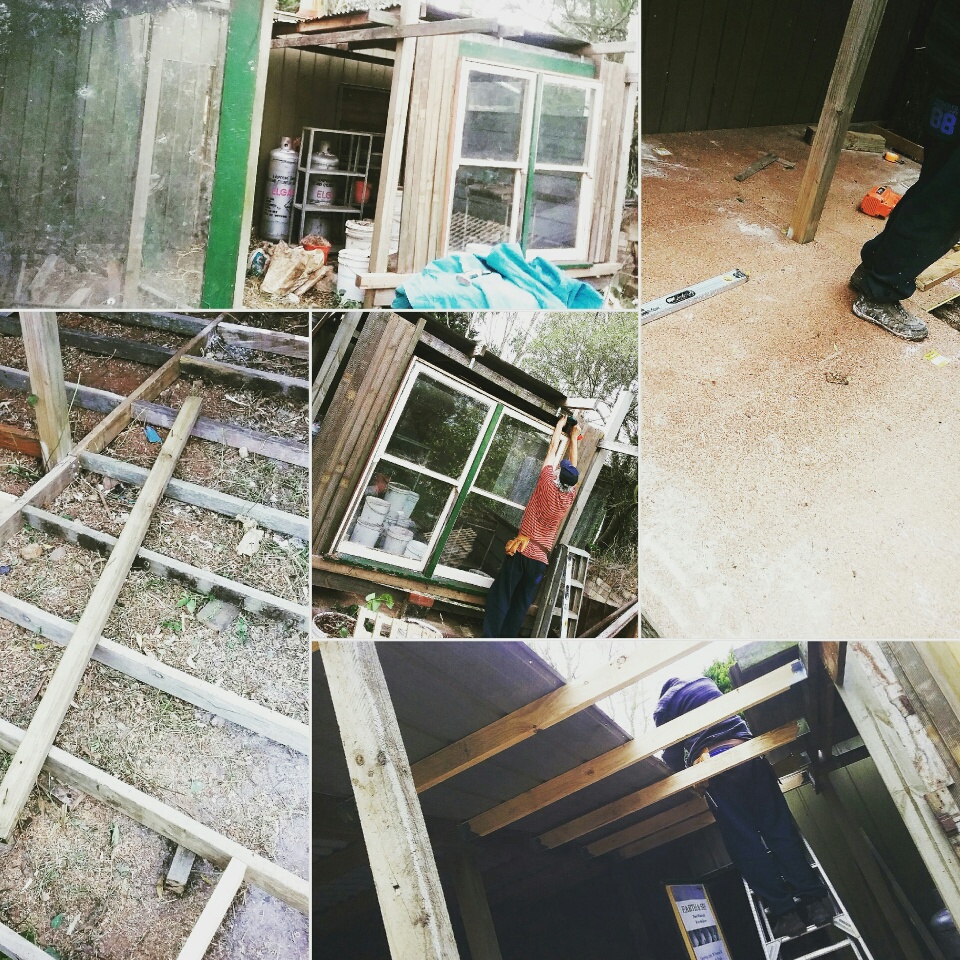
I am happy to report that most of the structure, and all of the shelving and storage units were made using upcycled materials. The only new materials we bought were the flooring, ceiling, walls, beading and insulation. The frame was built using recycled timber and the roofing recycled tin, and the windows came from 1) an old tabletop and 2) my house – a window that had been removed when building a verandah onto the back of the house. The paints were left overs from previous projects.

ClayMotion renovations

I’m really happy with the ‘recycling’ concept, as it offsets the footprint I leave with things like gas firings and transporting clay and glaze ingredients.

As mentioned the renos were started during the last school holiday period with the intention of having them finished by the time classes resumed, but we all know building projects never go to plan!! The main structure was complete by the two weeks, but there were a few bits & pieces that needed finishing – a bit of beading, for example – but the biggest delay was getting the kiln reconnected!!

However, the delay has perhaps been a little serendipitous. It gave me time to think about needing another kiln, which I did!

I decided I needed a new bigger kiln or another average sized kiln to service my growing business and I thought I should try to purchase one asap so that both kilns could get connected at the same time. I was lucky enough to find one really quickly – and a bargain – by posting a Wanted to Buy in some local Buy Swap & Sell Groups on Facebook. I received a reply quite quickly – a port o kiln which was about thirty years old, but that had never been connected or used…. just sitting in someone’s shed – in new condition!! (rubs hands together). They are both now reconnected, after a few weeks delay, so I am now in catch up mode on class work. I must the stents have been very understanding which has been great!

ClayMotion Kilns


The renovation has basically added two open space areas on the side of the existing studio. these spaces have become a glazing room and storage area. The other part of the renovation I love is the new ‘library’ area – perfect for sitting with a cuppa and browsing books or developing ideas in my visual diary. This corner in the existing studio was the old glaze area, but with everything being moved into the new room I could create this cozy space, something I have always wanted to do.

ClayMotion Studio


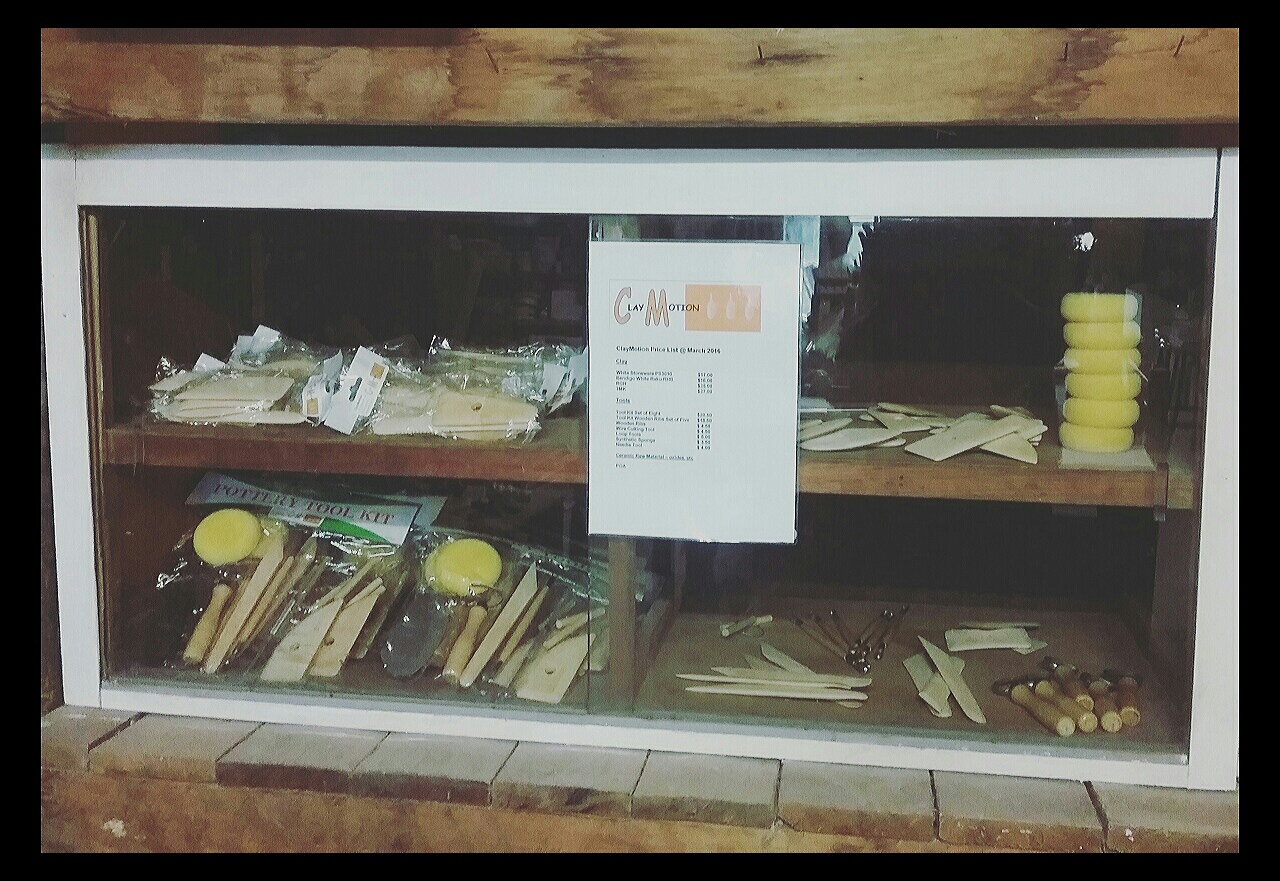
Creating the library cleared a space in a cabinet (where I used to store books) and this has now become a display cabinet for tools and equipment for sale – yes I also sell ceramic supplies and post Australia wide. the postage is included in the prices which are in the online shop on the CLAYMOTION website.

ClayMotion pottery supplies


There is still a bit of re-organising and tidying up to do, especially outside in the yard, but here are some pics this far:-)


Term Two Classes are Underway!

Term two is a long term – eleven weeks – after a short term one due to Easter, but we have just finished week three: where did that time go?

The weather so fr has been great, with a gorgeous Autumn and mild calm weather – until the last few days…. it has started getting windy which can be typical for this time of year. But, never fear, the studio is toasty warm with the wood heater in full swing.

ClayMotion

Remember that mid term enrolments are welcome with fees being calculated based on how many weeks are left in term. Can’t commit to an entire term?  Casual rates are available with your choice of three classes to attend.

And to inspire you check out some of the creations so far this term 🙂

Enjoy!

Some Finished Works from Term One – Pottery in Ballarat

Term One was a short term due to Easter, and it went so fast!

The dates for term two are on the CLASSES page and I suggest you enrol soon, as places are filling fast. I am contemplating putting on another adults class so the sooner I know numbers the easier it will be to organise times.

There is also a SCHOOL HOLIDAY PROGRAM these holidays focusing gifts for Mothers Day, so be sure to check that out.

I have scheduled some WORKSHOPS for term two and term four, both suitable for beginners, so check that page out for more info.

I’ll leave you with some pics of finished artworks from term one, and look forward to term two 🙂

Pottery Classes in Ballarat: Week Two – so many creative gems

Week two of adults pottery classes and everyone is getting right into it – creating some fabulous pots.

Mid term enrolments are welcome, simply email me or phone me on 0438382522 to organise. Everyone works at their own pace within the class, so you won’t be behind within the class, and you will only pay for the amount of weeks left in the term.

In the meantime, enjoy the pics 🙂

Tuesday Tutorial – check out our Pinterest Board

Did you know that ClayMotion is now on Pinterest?

Todays Tuesday Tutorial comes from the Pinterest account – a tutorial board with lots of cool projects which will continue to be added to – so get clicking and check it out!

https://www.pinterest.com/claymotion/pottery-tutorials/

pinterest

Tuesday Tutorial – handles

Today’s Tuesday Tutorial focuses on handles for mugs, jugs, casseroles- anything that needs a handle!

The video comes from the Ceramic Arts Daily website, and the presenter focuses on a different take on a more decorative handle, but the technique of attaching and paying attention to balance and form are the same for any handle being attached to any vessel, whether wheelthrown or handbuilt.

Enjoy, and remember to drop back in next week for the next Tuesday Tutorial 🙂

https://youtu.be/8cClVWOfcbw

Tuesday Tutorial: Using Kitchen Gadgets and Textured Slabs to Create Square(ish) Nesting Bowls

This weeks Tuesday Tutorial comes from the Ceramic Arts Daily website and is a great project using everyday kitchen objects as tools, and incorporating textures. It is also a great introduction to cutting darts in clay in order to make different and diverse shapes.

I am a great advocator of using kitchen gadgets and found objects when hand building, and use skewers, toothpicks, chopsticks, spatulas, forks and any interesting plate/bowl shapes that can be used as moulds.

This tutorial is easy to understand and has a photo essay of the steps so is easy to follow…. enjoy 🙂

http://ceramicartsdaily.org/pottery-making-techniques/handbuilding-techniques/how-to-make-a-slab-pot-using-textured-slabs-to-create-square-nesting-bowls/

chrietzbergnests_620-300x145


Finished Ceramic Artworks – Term Four

Finished Ceramic Artworks Adults Classes

As term four draws to a close – where did that time go- I thought I would share some pics of some finished artworks created during adults classes (and there will be more to come).

Term one 2016 begins at the end of January. All the dates are available on the CLASSES page and you can enrol online via the SHOP.

So, until the next blog post have a great week 🙂


Tuesday Tutorial – square forms on the pottery wheel

Happy Tuesday!

Over on the ClayMotion Facebook I have been sharing tutorials on Tuesdays for quite some time now, and it recently occurred to me that I should share them with ClayMotion blog followers too….so here we go:

Today I am sharing a tutorial from the Ceramics Arts Daily website: How to Make Squared-off Forms on the Pottery Wheel

This is not an overly difficult technique. For my students who can throw on the wheel, most of them would be capable of completing this project….and if you can’t throw on the pottery wheel, this project could be adapted to a hand built form – build your mug, or whatever form you would like to use, and then apply the technique from there.

So, give it go 🙂